In my student teaching seminar, students arrive to the live session after a wicked week of teaching. They are mired in lesson plans, addressing student needs, attending meetings, not to mention, managing their daily lives, which is still happening all around them. On the night they meet with me, it can either be a welcome relief or an additional source of stress.
Before starting with the content, it’s essential to allow students to lay their thoughts on the ground. I started using the grounding strategy to enable students to share what’s top of mind briefly, and then end with the statement, “I’m in.” The key is to provide as little context as possible. While we would love to hear the entire story, the purpose here is to stabilize their thoughts and set their intention for the class.
So why do I ask them to verbally state, “I’m in!” The purpose is to provide an intention for the next few hours – that regardless of everything that is happening around them, they are committed to leaving it at the door to focus on this course and our conversations. Saying ‘I’m in’ also allows students a space to share. We are not strangers coming together to learn. We are a community of learners with real lives and issues.
If a grounding strategy interests you, here are the directions. Make this your first slide before getting started, and see what happens when students declare, “I’m in!
Grounding Strategy
In a couple of sentences, explain how you’re feeling right now. Try and give as little context as possible.
Don’t hesitate to mention frustrations as well as excitements.
You’ve delivered a fabulous mini-lecture and you’re ready to send your students to the breakout rooms to discuss in small groups. Before you send them off, take some time to think through a few items that will foster a robust group discussion.
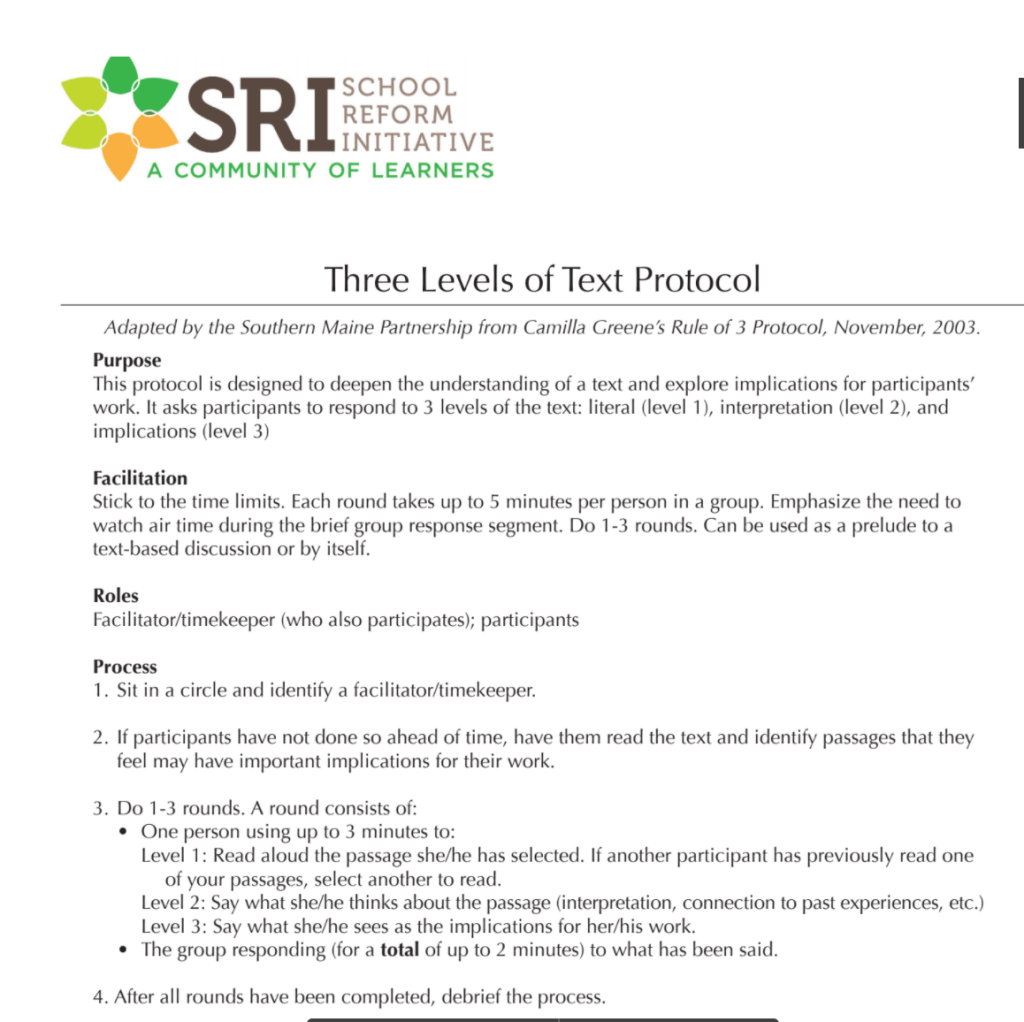
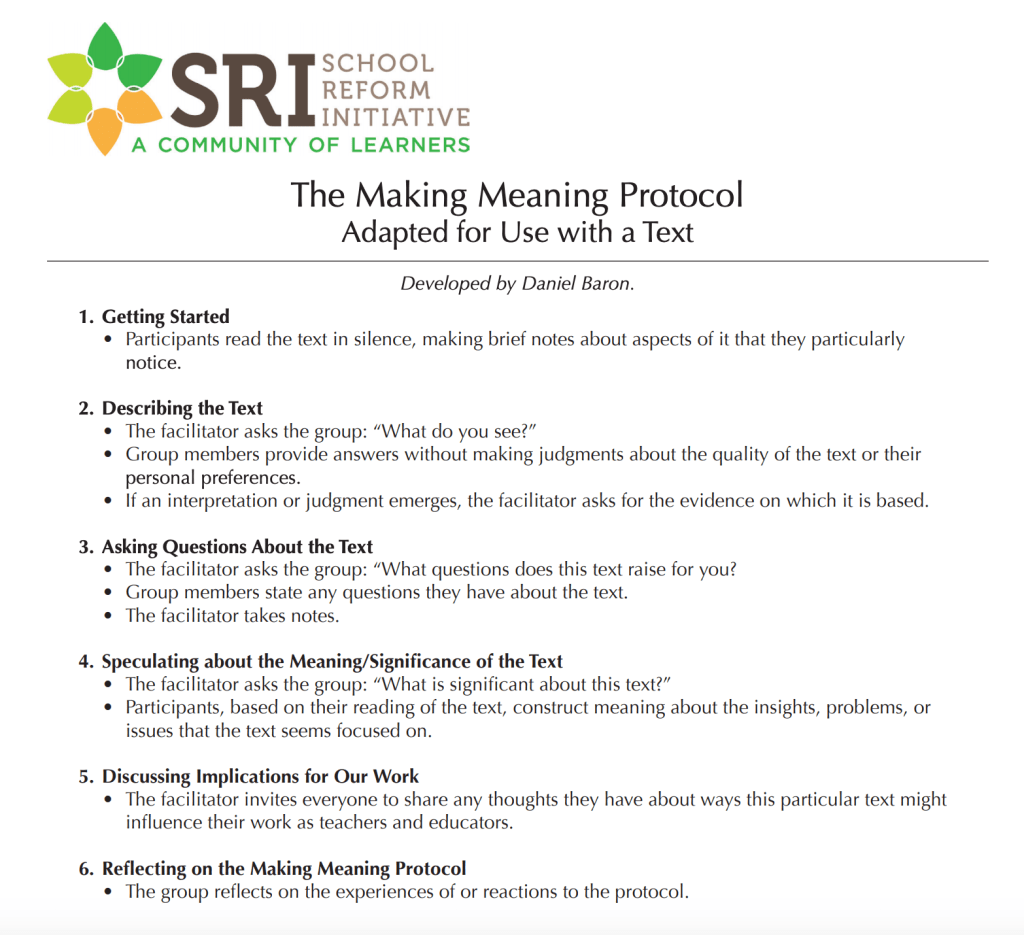
Step 1: Select a discussion protocol that aligns with your lesson objectives.
A discussion protocol gives students structured tools to have a meaningful conversation. It relieves students from the flat question like, “Ok, what do you all think?” which may get students going, but the discussions never last more than a few minutes and never help students delve deeper on the subject. Protocols also ensure that all students have an active role in the discussion, and no person dominates the conversation. Finally, protocols provide a safe environment to challenge ideas and pose questions to the group.
The protocols below are from the School Reform Initiative, which houses tons of protocols for educator use. Below are two of my most used protocols.
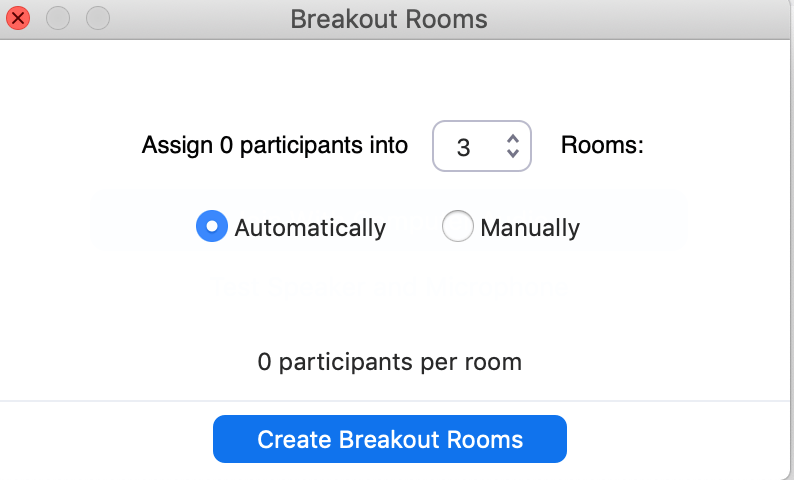
The easiest method is to use the random generator in Zoom, or your preferred video platform. Zoom will randomly place students in the selected number of groups.
Selecting a randomized group is a start, but is doesn’t ensure that all students will have contact with all of their classmates. By actively selecting groups, students will regularly hear from a variety of perspectives. Imagine sitting at the dinner table with the same group of people every night. After awhile, we all start to agree on the same issues. We can even predict how someone will respond. It can get boring. Intentional randomized groups ensures that students hear from everyone and students learn how to respond to various perspectives. It keeps it fresh.
Groups can also be based on the course readings. For example, if you had 4 course readings for the week, you can assign each person a focus article. When students come to the live session, they know they must speak from their article’s perspective using the protocol you previously selected. You can group students by those who read the same article or mix groups with one person representing each article.
Grouping by the same article: 1111 2222 3333 4444
Grouping by mixed articles: 1234 1234 1234 1234
Step 3: Determine how to explain the task to students
After selecting the protocol and determining groups, now’s the time to prepare your directions for students. Here is a quick way to make this happen.
Place it in your slide deck. This is my go-to. I reserve a slide in my presentation deck that provides the discussion directions with links to the resources (i.e. articles, protocols, group assignments). Before class or during the live session, I give students access to the slide deck. Once I’ve delivered my lecture and arrive at the break out room slide, I quickly review the directions, group my students, and send them off with the presentation in hand.
Ask students to assign a lead facilitator for each group who can share the presentation in the break out room and keep time.
Step 4: Ask yourself what participation role you plan to play
Ask yourself these questions when determining your role: Do you want to be an active participant in the discussion or do you want to allow students the space to discuss without your input? There’s no right answer here. It is merely preference. Some instructors enjoy being an active participant and jump from group to group to pose their own questions and responses to the text. Other prefer to allow their students a private space to discuss.
The good news is that because you have given students a structured protocol, every group is guaranteed to have a rigorous conversation. Regardless of your choice, when students resume to the whole class, ask your group to identify a spokesperson to summarize and capture the group’s key ideas.
The chatbox is the most overlooked tool in a live session. When used regularly, it can provide the professor quick access to student questions, comments and responses. The key to enacting the chat box is to make its purpose intentional. Below are four key strategies to activate your chat box and engage students in learning.
Access Prior Knowledge
Accessing prior knowledge is key to understanding what your students already know about the topic you are about to teach. At the beginning of the class, ask students to take 1-2 minutes to post what they already know about the topic. As students post, you can quickly scan the results and determine which topics you may need to delve deeper, or that can be removed or only briefly addressed in your lecture.
Think and Post
Most of us tend to pose a question to the whole group. The problem with the strategy is that the quickest thinkers are the first to respond. In a class of 18 students, only 3-5 students might get the opportunity to speak. That means only 16% of your students are actively engaged. Yikes! To ensure 100% engagement, allow students to pause after you pose a question and then ask them to post their response in the chatbox. Once students post, you can call on students to expand on their ideas or use the posts as an informative assessment to determine gaps in knowledge that you may need to clarify.
Post A Question
“Do you have any questions?” Whenever I ask this question, I inevitably get nodding heads on mute. Providing students with sentence stems is a quick way to jumpstart their thinking and encourage questions. Instead of asking, ‘Do you have any questions?’ ask students to complete one of the following question starters and post it in the chatbox. The list of questions is endless, but offering students a few stems gives them permission to clarify or gain more information about the content.
Can you tell me more about ….?
Can you explain why…?
Why do you think …?
How does this compare to…?
Key Takeaways
Reflection provides students with an opportunity to think about their learning. Ask students to post 1-3 key takeaways in the chatbox at the end of the live session. What did they learn from today’s lesson? How will they apply the information to their work or lived experiences? Depending on how much time remains, invite a few students to share or ask for volunteers.
The first live session is an exciting experience. In an online class, your students have downloaded the digital textbook and are ready to tackle the learning at hand. As you prepare for your first live session, here are a few items to consider.
Break the Ice
The worst part about the first night of class is not knowing anyone. Now imagine not knowing anyone as you stare into your camera. Our first job is to create a community, and what better way to do this than an icebreaker. Here is one of my favorites:
Find an Object
Ask your students to turn off their camera and search for an object in their home that is most meaningful to them. Give students a few minutes to shuffle around their house or move their computers if they have to share a larger object. When they come back, allot 1-2 minutes to share. This is a great opportunity to share something about yourself, too. Our homes are our most personal spaces, so it finding an object — a plant, a pillow, a kitchen gadget, a snack– will also allow your students to get a glimpse of your personality.
Depending on the size of your class, you can do this strategy as a whole group, or create a more intimate setting using break out rooms. We know how intimidating it can be to share a prized object in a large group. A small group setting will definitely make it more comfortable.
Note: If this icebreaker doesn’t suit your fancy, do a quick google search and you’ll surely find one that does!
Be the Tour Guide
Your students may be unfamiliar with the online environment you have painstakingly prepared. Take some time to share your screen and introduce some of the features of your video conferencing tool. Show them how to check their audio, share their screen, chat, add a background, or accept an invitation to a break out room. Seeing that there are over 30 video conferencing tools out there, your students will appreciate a quick overview.
Likewise, your students will want to know how you house information in your Learning Management System or LMS. It is worth stating that Blackboard is not the same as Canvas which is not the same as Google Classroom. Your students will benefit from a quick shared screen that allows them to see how you organize the course content. Think of this as sharing the syllabus digitally. By introducing the info via the LMS, you kill two birds with one stone.
Q & A Time
Reserve the end of the live session to allow students to ask questions. While we might have covered the basics, your students may have additional concerns that need to be addressed. Be mindful of the time. I have a habit of ending the course and then asking students if they’d like to stick around to hear the questions. That’s not totally fair to them, so I try my best to include it within the allotted time.
If you’d like, you can also formalize the ending of your course by asking students to respond to one or more of the following statements:
I still have a question about . . .
I am most excited to learn about . . .
I’m not sure where to find . . .
Can you explain . . .
You can do a quick whip around to close the course and bid adieu.
The first live session sets your students up for success, allows them to get to know each other, and permits them to ask any questions. If you hit the mark on all three, you’re on your way to a great term.
How can I provide a place for my students to ask questions?
Do you want your students to have the ability to send a question or post a resource that is not connected to anything specific. The most efficient way to do this is in good ol’ Module 0.
Under Module 0, create an ungraded Canvas discussion titled, “Questions for the Instructor and Resources.” This provides an easy location for students to quickly ask questions regarding the content or seek support from each other. Instructors can also post additional resources that connect to the course.
This ungraded discussion offers students a quick location where they can connect with classmates and the instructor. If you subscribe to the discussion, you will receive an email notification that alerts you of a new post.
Bonus: If you are not able to answer a question, students have the ability to help each other in this ungraded, informal discussion.
What components should I include when I set up my online course?
The first module in many online courses is Module 0. Module 0 is the single source of information that students need to be successful. It can include any of the following:
Course Overview
Syllabus
Milestone Assignments
Course Readings and Texts
Course Outcomes and Expectations
An Introductory Message from the Instructor in narrative or video form. Or both!
Questions for the Instructor
Additional Course Resources
Some professors choose all of these options and some choose only a few. Whichever you choose, consider your students needs. What information do they need to be successful in your course?