You’ve delivered a fabulous mini-lecture and you’re ready to send your students to the breakout rooms to discuss in small groups. Before you send them off, take some time to think through a few items that will foster a robust group discussion.
Step 1: Select a discussion protocol that aligns with your lesson objectives.
A discussion protocol gives students structured tools to have a meaningful conversation. It relieves students from the flat question like, “Ok, what do you all think?” which may get students going, but the discussions never last more than a few minutes and never help students delve deeper on the subject. Protocols also ensure that all students have an active role in the discussion, and no person dominates the conversation. Finally, protocols provide a safe environment to challenge ideas and pose questions to the group.
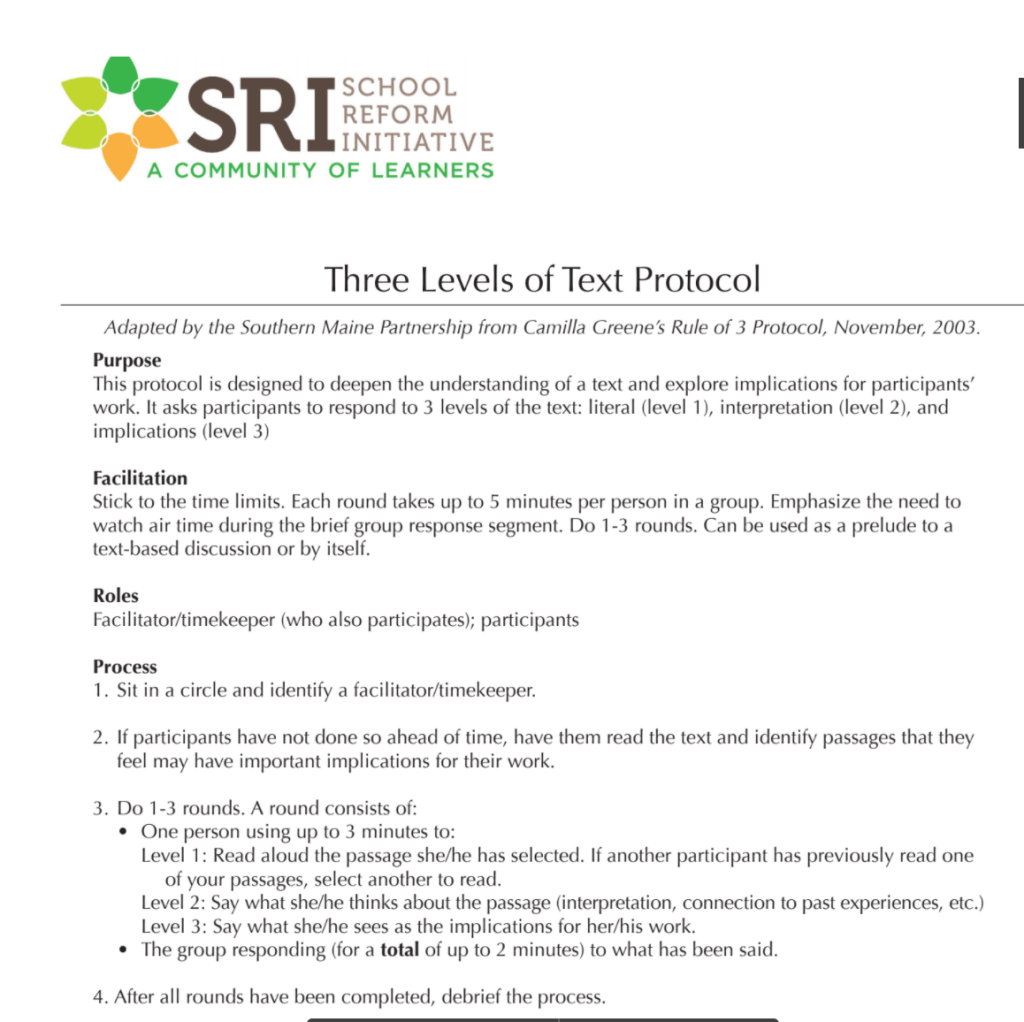
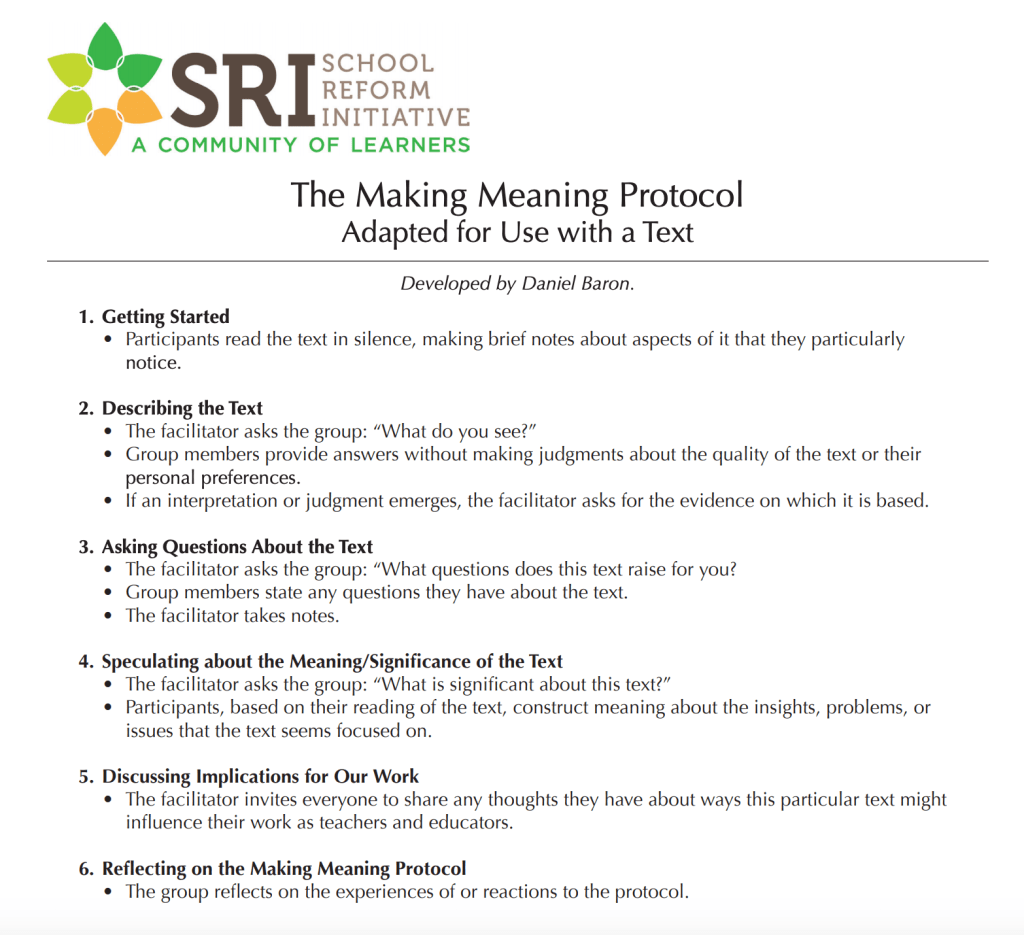
The protocols below are from the School Reform Initiative, which houses tons of protocols for educator use. Below are two of my most used protocols.
Looking for more protocols: Try Cult of Pedagogy’s Big List of Classroom Discussion Strategies. Some of these may need to be adapted for the online classroom.
Step 2: Decide how to group students
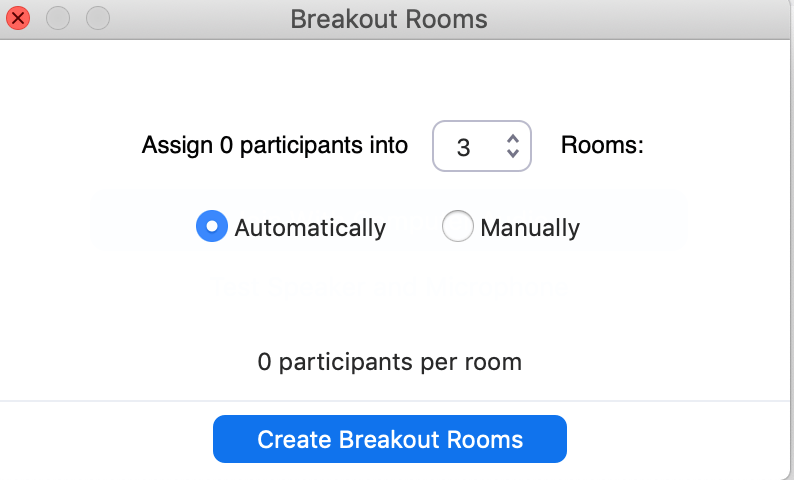
The easiest method is to use the random generator in Zoom, or your preferred video platform. Zoom will randomly place students in the selected number of groups.
Selecting a randomized group is a start, but is doesn’t ensure that all students will have contact with all of their classmates. By actively selecting groups, students will regularly hear from a variety of perspectives. Imagine sitting at the dinner table with the same group of people every night. After awhile, we all start to agree on the same issues. We can even predict how someone will respond. It can get boring. Intentional randomized groups ensures that students hear from everyone and students learn how to respond to various perspectives. It keeps it fresh.
Groups can also be based on the course readings. For example, if you had 4 course readings for the week, you can assign each person a focus article. When students come to the live session, they know they must speak from their article’s perspective using the protocol you previously selected. You can group students by those who read the same article or mix groups with one person representing each article.
Grouping by the same article: 1111 2222 3333 4444
Grouping by mixed articles: 1234 1234 1234 1234
Step 3: Determine how to explain the task to students
After selecting the protocol and determining groups, now’s the time to prepare your directions for students. Here is a quick way to make this happen.
Place it in your slide deck. This is my go-to. I reserve a slide in my presentation deck that provides the discussion directions with links to the resources (i.e. articles, protocols, group assignments). Before class or during the live session, I give students access to the slide deck. Once I’ve delivered my lecture and arrive at the break out room slide, I quickly review the directions, group my students, and send them off with the presentation in hand.
Ask students to assign a lead facilitator for each group who can share the presentation in the break out room and keep time.
Step 4: Ask yourself what participation role you plan to play
Ask yourself these questions when determining your role: Do you want to be an active participant in the discussion or do you want to allow students the space to discuss without your input? There’s no right answer here. It is merely preference. Some instructors enjoy being an active participant and jump from group to group to pose their own questions and responses to the text. Other prefer to allow their students a private space to discuss.
The good news is that because you have given students a structured protocol, every group is guaranteed to have a rigorous conversation. Regardless of your choice, when students resume to the whole class, ask your group to identify a spokesperson to summarize and capture the group’s key ideas.
